
Are you contemplating the creation of your indoor golf haven, complete with the innovative Uneekor EYE XO2 launch monitor?
As winter approaches, golf enthusiasts worldwide face the inevitable hiatus from the course, stowing away their cherished clubs until the arrival of spring’s warmth.
It’s a somber period for golfers as drives linger unstruck, putts patiently wait to find the hole, and the thrill of shaving shots off handicaps remains suspended until the thaw. The dormant months test the patience of avid golfers, leaving them yearning for the day they can resume their passionate pursuit of the perfect swing.
If the winter golf hiatus has left you craving the feel of a club in your hands and the sound of a well-struck shot, perhaps you’re considering constructing your indoor golf simulator with the help of the Uneeker Eye XO2.
That is why we have put together this comprehensive review, so you can get all of the information you need in one place about the Uneeker Eye XO2. There are a lot of great monitors these days on the market and it can be overwhelming to sort through them all yourself.
In this comprehensive review, we will talk about key technologies wrapped inside the XO2, the process of installing the XO2, and finally the user experience and available software packages.
Technology And Features
The technology and ease of use included with the XO2 is truly remarkable. For the person who wants a true dream simulator, this is the top of the line option.
What You Will Receive
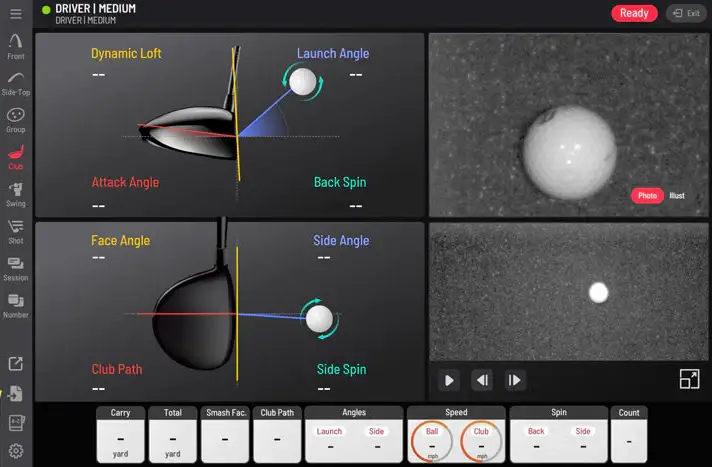
- EYE XO2 Launch Monitor – Building on the success of its predecessor, the EYE XO2 incorporates a third high-speed camera, operating at over 3000 frames per second. This addition enhances the precision of data capture, ensuring a comprehensive analysis of every aspect of your swing.
- Uneekor Trouble Mats – The EYE XO2 introduces a hitting area measuring 28″ W x 21″ L—a 300% increase compared to the EYE XO. This expanded space accommodates the Uneekor Trouble Mat, an all-terrain accessory designed for realistic simulations of various surfaces, including bunkers and rough.
- Mounting Bracket with Level – To help with a smooth and seamless installation, ensuring accurate data measures.
- Calibration Chart
- 11ft Power Cable, Adapter, and Connector
- USB Ethernet Adapter w/ CAT6 Ethernet LAN Cable
- (400) EYE XO2 Club Stickers
- (10) M4 32mm Screws and (10) M6 15mm Screws
- (4) M6 15mm High Screws and (4) Low Screws
Data Points Tracked
- Club Head Speed
- Club Path
- Smash Factor
- Club Face Angle
- Club Face to Path
- Angle of Attack
- Club Loft Angle
- Club Lie Angle
- Vertical Impact Point
- Horizontal Impact Point
- Dynamic Loft
One thing that is a minor annoyance about receiving club data is that you have to place the provided stickers on your clubs. Other monitors on the market such as the Mevo + do not require this.
Setup
In contrast to alternative monitors designed for versatility between indoor simulators and outdoor play, the XO2 is intended for a one-time mounting, without subsequent relocation.
Our experience revealed that the outlined mounting process, detailed below, is straightforward but involves a more intricate installation compared to other monitors we have previously reviewed.
Setup: The Comprehensive Guide
Given that the XO2 is designed for a one-time setup catering to multiple uses, the installation process of the Uneekor EYE XO2 is pivotal in guaranteeing peak performance and precise data readings. Below are the essential steps required for its proper installation that you will have to go through.
1. Mounting the Bracket:
- Begin by slightly loosening the black screws holding the sensor to the bracket, and then carefully remove the sensor.
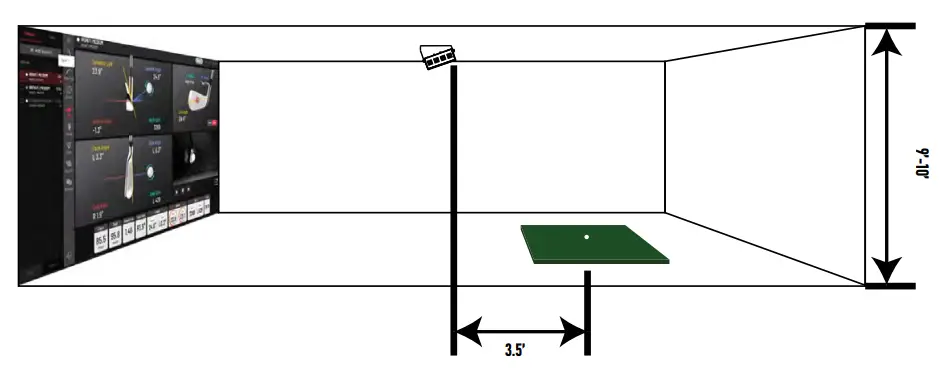
- Position your ladder under the designated mounting location, ensuring that the front of the sensor will be 3.5 feet from the tee position. This measurement is essential to future club and ball readings.
- Climb the ladder and place the bracket flat against the ceiling, with the hinges facing down towards the ground. Ensure that the EYE XO logo is on the side of the hitting zone, and the longer side with the hinges is closer to the screen.
- Secure the bracket by screwing in the silver 32mm screws into the ten locations on the bracket.
2. Installing the Sensor:
- Confirm that the six screws already inserted into the bar are about halfway down.
- Slide the bar with the screws through the bracket, ensuring the screws are secured in the hinge slots. Once the sensor is in place, tighten all screws securely.
- Optionally adjust the tilt of the sensor by swapping the regular 15mm screws already in the sensor with the high or low screws provided.
Note: The process of mounting the bracket and sensor is very easy, only taking 15-20 minutes.
3. Establishing Connections Between the Eye XO2 and PC
- Connect the Ethernet LAN cable from the sensor to your PC through the Ethernet port.
- Connect the power cable, power adapter, and power connector. Flip the red switch on the sensor and verify that the power is on by observing the bright red light on the sensor’s switch.
- Pair the EYE XO2 with your PC by setting the static IP addresses according to Uneekor’s Network Setup Guide.
Note:The “Network Setup Guide” is included is helpful with pairing the IP addresses of the sensor and PC.
4. Software Installation:
- Install Uneekor’s View, Refine, or Refine+ software based on your purchase. The installation code will be provided via email, and you should follow the steps outlined in the installation guide.
- The Uneekor Launcher software is recommended for a convenient all-in-one hub, allowing you to go through an interactive installation wizard for the EYE XO2, access the View software, connect to third-party solutions, and manage all other devices.
Additional Notes
- Ensure that your PC meets the minimum specifications, including Intel i5 8400, 8GB RAM, GeForce GTX 1060, and Windows 10 (64-bit, version 1803). AMD users need at least a 3rd-gen Ryzen and AMD Ryzen 3600.
- Verify that your hitting mat is level for accurate shot data.
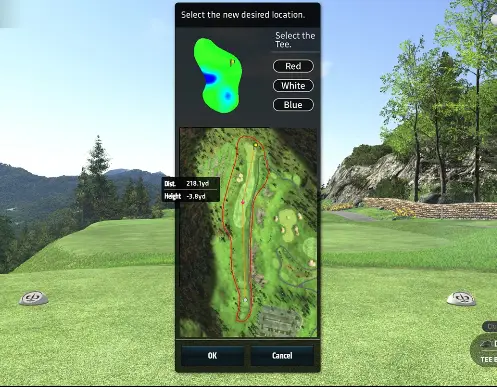
- Calibrate the EYE XO2 before the first use using the provided calibration tool.
- Apply the club stickers (included) to the club head to measure club data. The location of the application depends on the design of the club head.
The User Experience And Software Integration
One great thing about the XO2 is the many features and software integrations that can be made. In this section, we will briefly cover these features and integrations so you can get a feel for what is like to use the system.
Optix
The Optix technology that is available as an add-on comprises three integral components:
Ball Optix (Included in base purchase): This component provides a detailed close-up image showcasing the ball’s position concerning the club face at the moment of impact. Additionally, it captures the actual spin of the golf ball after each shot, offering valuable insights into ball behavior.
Club Optix (Included in base purchase): Offering a glimpse into the club’s orientation at impact, Club Optix presents a real-time slow-motion video of the club striking the ball. This feature enhances the understanding of the club’s dynamics during the swing.
Swing Optix (Available for purchase): Enabling multi-angle video capture, Swing Optix facilitates slow-motion playback and incorporates drawing tools for comprehensive swing analysis. Users have the option to enhance their setup with additional cameras—either Uneekor’s specialized Swing Optix cameras or compatible third-party solutions.
Balance Optix (Available for purchase): This feature is activated by utilizing Uneekor’s Balance Mat, a biomechanical training system designed to measure weight transfer throughout the swing. With Balance Optix, users gain real-time insights through a heat map, showcasing weight distribution changes during the swing and providing a deeper understanding of body movements.
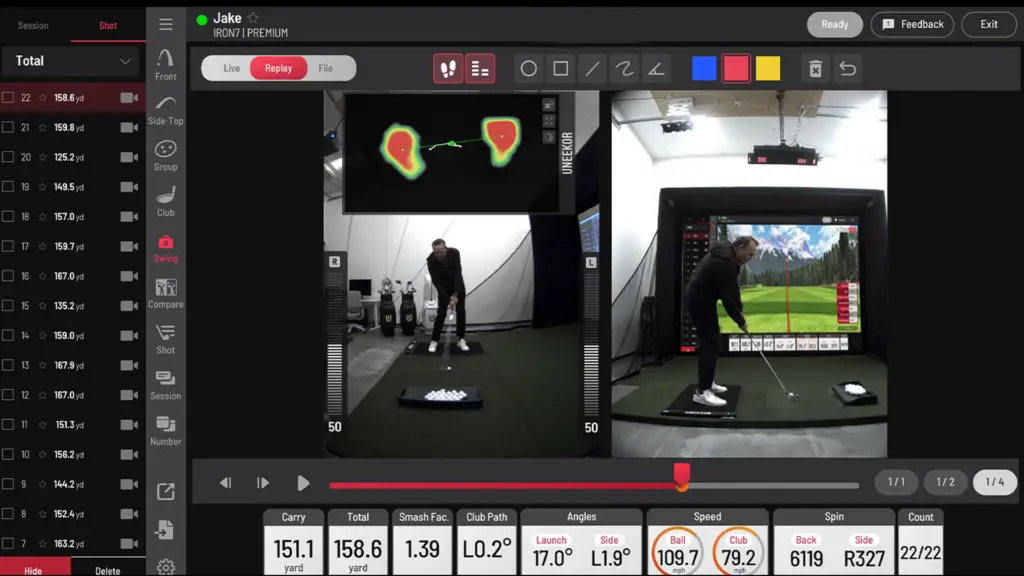
View Software
The Uneekor EYE XO2 offers golfers a cutting-edge practice experience with its View Software included with an initial purchase. Available seamlessly on iPad and PC. This versatile platform provides unlimited driving range practice sessions day or night, ensuring golfers can refine their skills at their convenience.
The MyUneekor login grants access to the PowerU Report, a personalized hub for comprehensive data analysis, allowing users to track progress and fine-tune their gameplay.
The ‘Peak Driving Range’ adds an exclusive touch to practice sessions, and meticulous tracking of Ball and Club Data ensures golfers gain insights into their performance.
With a focus on visualizations, the View Software offers a variety of shot perspectives, aiding in in-depth swing analysis.
Refine Software
The Refine Software, available at an additional cost, unveils a comprehensive set of features designed to transform your home practice facility into a versatile training ground.
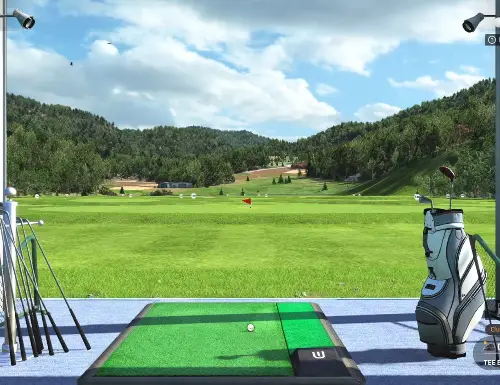
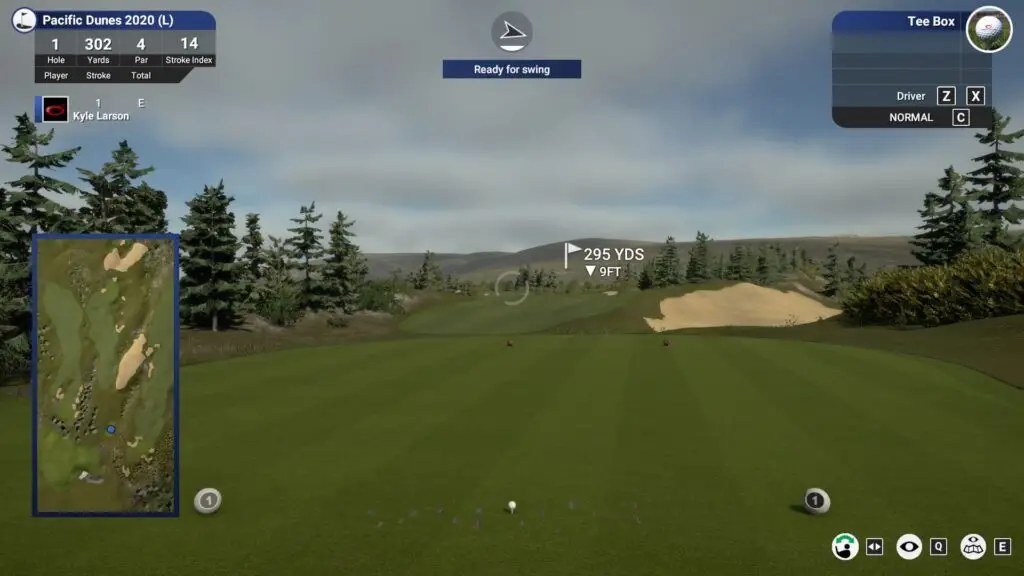
Driving Range mode offers the opportunity to discover and refine your golf swing and shot-making ability. The realistic graphics with the Refine software make it a very enjoyable experience.
Dive deeper into your short game with the Short Game Complex, where you can master flop shots, experiment with bump and run techniques, and dial in your wedge game from different locations.
The Challenge Mode introduces a touch of friendly competition, allowing you to perfect your approach game from 60-120 yards and compete with playing partners to showcase the best touch in the game.

Course Practice mode provides a versatile platform for working on shots from any distance on the course, enabling you to sharpen your skills by hitting various shots from the same position.
Engage in Stroke Play by playing one of the five 18-hole golf courses included in the software, putting your skills to the test in a full-round simulation. Below are the included courses with Refine.
Quick Mode offers targeted improvement, allowing you to focus on specific areas of your game, whether it’s correcting a slice or enhancing the accuracy of your tee shots.
Refine+
All the great features of the Refine software plus an additional fifteen courses.
E6 Connect
The included E6 Connect app for iOS and PC enhances the Mevo+ golf simulation, seamlessly integrating Uneeker XO2 performance data for an accurate representation of your game. Enjoy an immersive experience with ten recreated courses, from Bay Hill in Florida to Oslo Golf Club in Norway. The app also provides 17 practice ranges and skill-challenging games, offering purposeful practice and skill refinement in a virtual setting.
The Golf Club 2019
The Golf Club 2019, exclusive to PC, is renowned for its extensive course selection and rich features. Originally a video game adapted for simulators, it boasts exceptional graphics, sound, and lighting. Offering over 170,000 courses, including user-designed ones, TGC 2019 allows users to:
- Play online in global tournaments with strangers, friends, or family.
- Engage in solo rounds or local multiplayer matches.
- Access a vast library of courses for diverse gameplay.
- Practice range, chipping, and putting skills within the software.
Available play formats encompass stroke play, match play, stableford, four ball, skins, and alternate shot. A unique multiplayer feature permits up to four players to simultaneously take shots. Additionally, users can personalize their experience by designing custom courses using a detailed editor, adjusting themes, terrain, and layout with ease.
Pricing
The Uneeker XO2 is in the top end of the golf launch monitor price range but if you can afford the sensor and add ons it really does give you the full package.
- Uneeker X02 Monitor: $10,990
- Swing Optix: $1,400
- Balance Optix: $1,800
- Refine Software: $1,000
- Refine+ Software: $2,000
- E6 Connect Subscription: $2,500
- The Golf Club 2019 Subscription: $950
Key Takeaways
- Winter Golf Solution:
- The EYE XO2 serves as an ideal solution for golf enthusiasts seeking indoor play during the winter months when traditional golfing is not possible.
- Cutting-Edge Technology:
- The EYE XO2 boasts cutting-edge technology, featuring a third high-speed camera operating at over 3000 frames per second for enhanced data precision. The Uneeker Trouble Mat, mounting bracket, and calibration tools are included for a complete setup.
- Data Points Tracked:
- The launch monitor captures various club and ball data, including club head speed, smash factor, launch angle, and more. Club stickers need to be applied to get club data, a minor inconvenience compared to some competitors.
- One-Time Setup:
- Unlike versatile monitors, the XO2 is designed for a one-time installation, providing stability and accuracy. The setup involves mounting the bracket, installing the sensor, establishing connections, and software installation.
- User-Friendly Software:
- The View, Refine, and Refine+ Software offers a seamless experience on iPad and PC for Uneeker XO2 users. E6 Connect and The Golf Club 2019 software can be seamlessly integrated for an awesome user experience.
- Pricing Overview:
- The Uneeker XO2 comes at a premium price, but it provides a comprehensive package. Users can choose additional features such as Swing Optix, Balance Optix, Refine, Refine+, E6 Connect Subscription, and The Golf Club 2019 Subscription based on their preferences and budget.